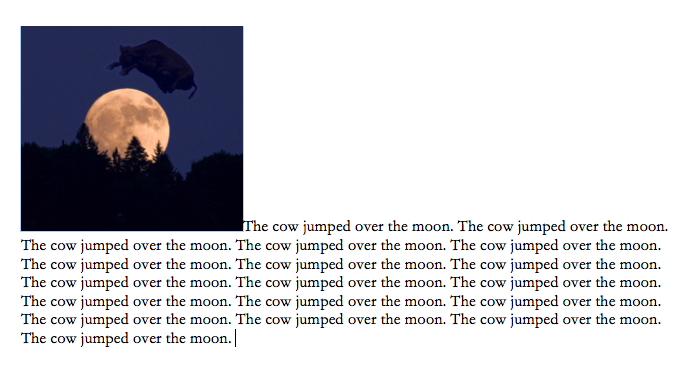
When you insert a graphic into a document, by default, Word treats it like a giant alphabet letter. Any text beside it is aligned so that its first line is even with the bottom of the image, with the rest flowing underneath.
Most of the time, it’s more effective to float the image on the page so that it can move freely, and the text flows around the graphic. Here’s how you wrap text around graphics:
Change the Text Wrap
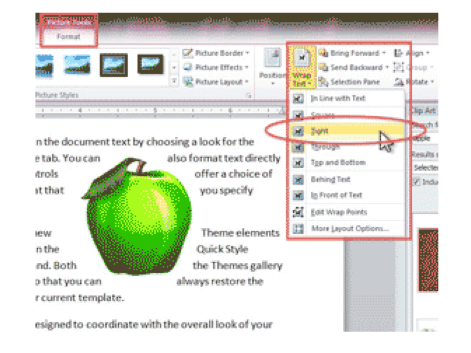
After inserting any picture, clip art, or graphic into a document, click on it to make sure you can see the resize handles around it. When a graphic is selected, a new PICTURE TOOLS > FORMAT ribbon appears at the top of the screen. On the right side of the ribbon, click on the WRAP TEXT button.

Choose an appropriate Wrap style:
- IN LINE WITH TEXT is the default. The graphic acts like a giant alphabet letter. Its size spreads out the lines of text, creating a gap. Moving the image is just like moving text.
- SQUARE wraps the text around all four sides of the graphic. This is the most common Wrap style.
- TIGHT wraps the text around the shape of clip art and cut out graphics. This looks great for curved images, and graphics with transparent backgrounds.
- THROUGH allows text to flow into the white space of a graphic. To see the full effect, you may need to edit the Wrap points (see below).
- TOP AND BOTTOM confines the text to appearing above and below the graphic. The sides remain empty.
- BEHIND TEXT layers the text and image so that the image appears in back of the text. Be careful to maintain legibility using font styles and colors.
- IN FRONT OF TEXT forces the image to float on top of the content. You won’t be able to read the text behind the graphic.
Fine Tune the Placement
After setting the Wrap style, drag the image to the desired location. Fine-tune the placement using the ARROWS on the keyboard.
On some keyboards, you may be able to use ALT, CTRL, or other modifier keys to move the image in tinier increments. Be very careful not to orphan words in blank spaces, or interfere with readability.
Edit the Wrap Points
Editing the Wrap Points helps control readability and how smoothly the text flows around the graphic, especially when working with Tight and Through.
To control how close the text is to the image, click on the image and then on EDIT WRAP POINTS.
Drag the black dots CLOSER TO and FARTHER FROM the image to adjust the distance to the text. Pulling the dots into an image forces the text closer.
Add ADDITIONAL CONTROL POINTS by clicking on the red line.

Set Default Wrap Styles
If you always need to have your graphics float, make that the default when you insert new images.
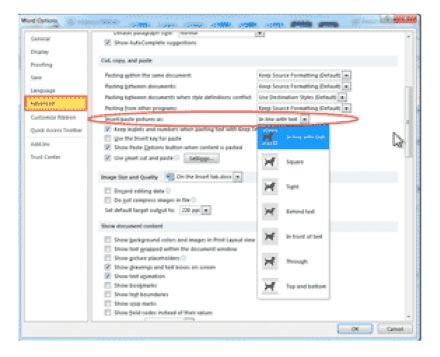
In FILE > OPTIONS > ADVANCED and then in the Cut, Copy, and Paste section, find INSERT/PASTE PICTURES AS: and change IN LINE WITH TEXT to either SQUARE OR TIGHT, whichever is your preference.
Buy the Book
 For the complete collection of time-saving tips and tricks, buy my book, Microsoft Word 2010 Tips & Tricks. Available in eBook, iBook, Multi-touch, and paperback versions.