QBO’s New Receipt Capture!
Look What I Found!
You’ve long been able to use the QBO app on your smartphone to take pictures of receipts to add them to your QuickBooks Online file, but you had to type in all the information with your thumbs. That was time-consuming and cumbersome.
I recently had the privilege of beta-testing QBO’s new Receipts Capture, and I’m excited to see it rolling out to my clients’ files. Click on Banking and look for the Receipts tab at the top. If you don’t see it yet, you will soon!
Let’s check it out!
How to submit receipts
There are three ways to add your paper receipts to QBO.
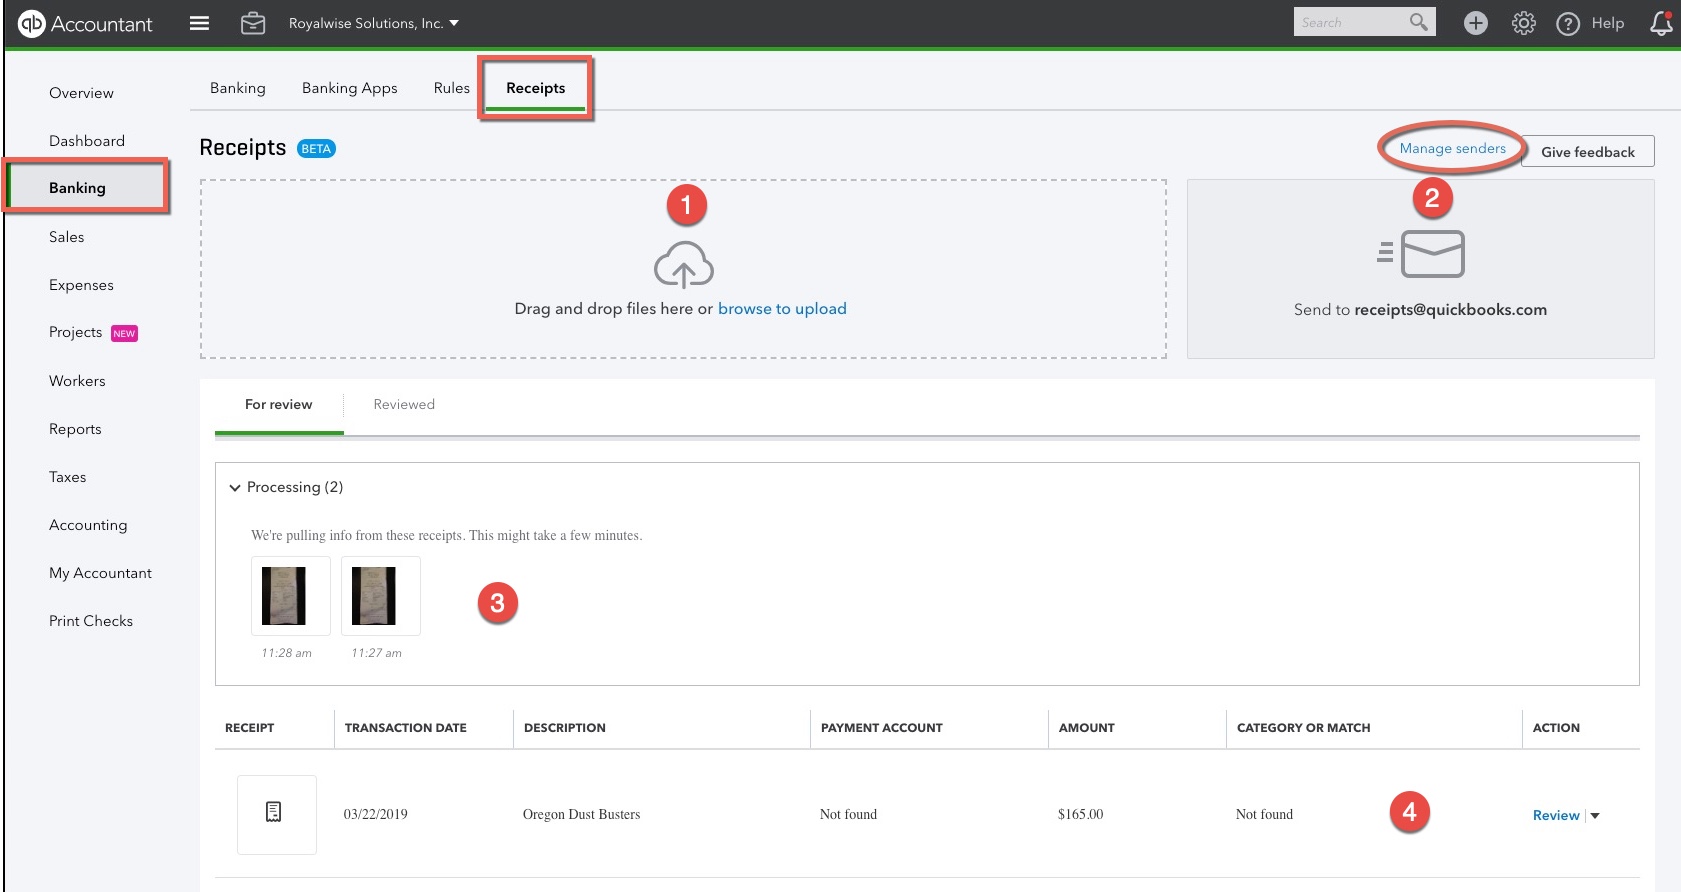
First, you can simply drag-and-drop a .jpg or PDF file onto the main box (1). You can also click on the box to navigate to the image on your computer and select it that way.
Second, if you use the QBO app on your phone, there’s a new option for Receipt Capture under the +. With it, snap a picture of the receipt and save it for scanning. It couldn’t be easier!
Last, it’s now possible to email your receipts straight into QBO (2)! Click on the Manage Senders link on the upper right.
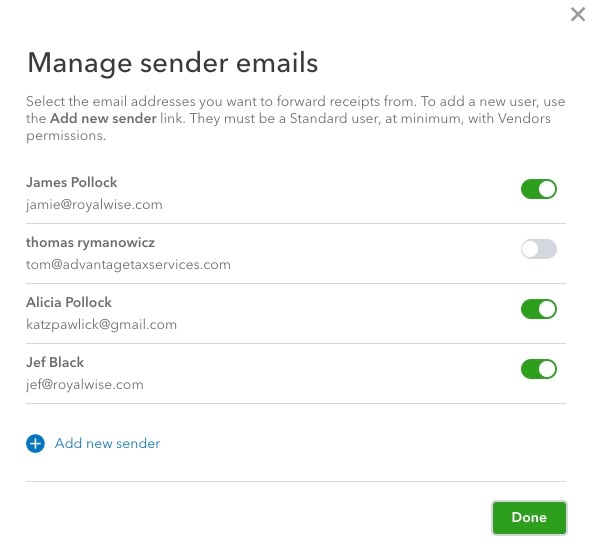
Click Add new sender. The email address must be for a QBO user who has at least Standard user permissions, with access to Vendor transactions.
Note that this limits bookkeepers for adding receipts via email, because one email address can only be associated with one file. If you work with more than one QBO file, you will need to use a different email address per client…or just use the drag-and-drop method from your computer.
Once the Senders have been added, they can now send an email to receipts@quickbooks.com, and the attachment will be forwarded to the correct QBO account.
You can even submit multiple receipts in one email message!
My only concern is that pictures of the receipts stay on the cell phones. If you implement this system with your employees, you may need to decide if that is a security breach. At a minimum, train them to delete the images once you have confirmed that the workflow is finished.
We use Receipt Forwarding successfully at Royalwise, using all three methods. My favorite is the in-app camera.
Once you’ve sent in or added your Receipts, you’ll see them in Processing (3). It may take a few minutes for the OCR (optical character recognition) to finish working its magic.
Classifying Receipts
There are two workflows for categorizing your Payees and Accounts. One is to do the work in Receipts and Match it in Banking. The other is to do the work in Banking and Match it to the Receipt!
Entering the Receipt First
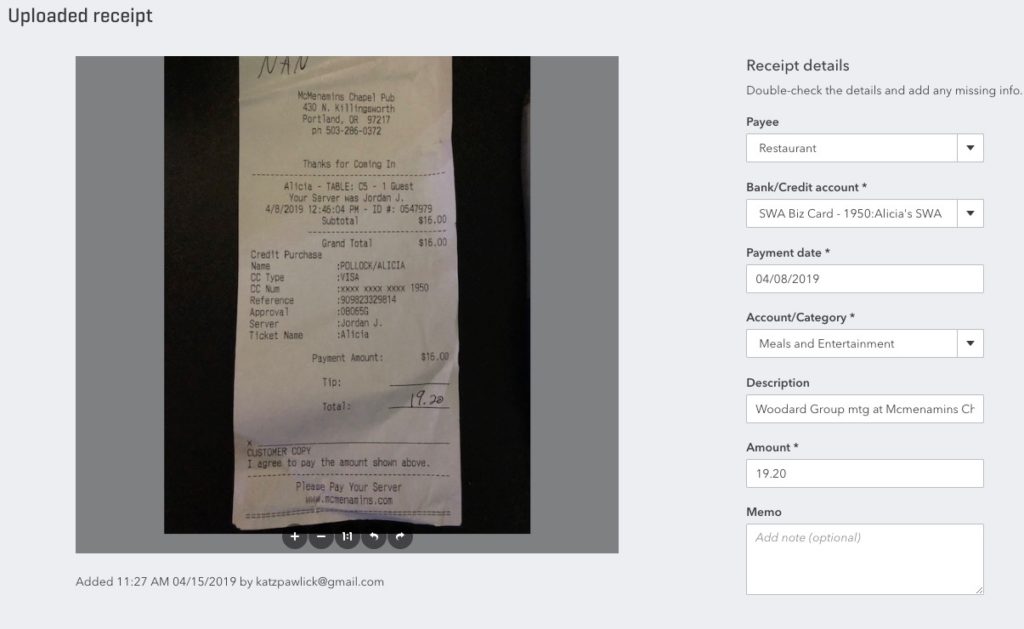
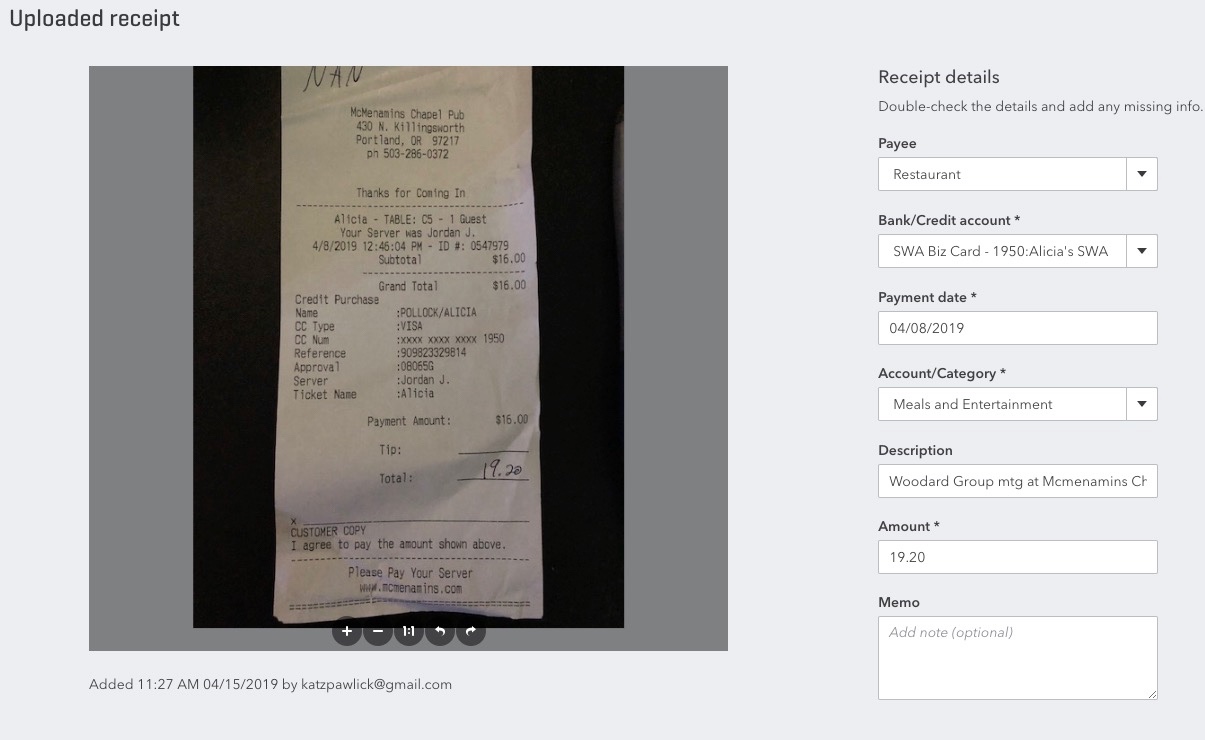
If the expense is straightforward, click on the entry at the bottom of the screen (4).
Note that the OCR may have entered best guesses that have little to do with reality. Just like with the Banking Feed, the artificial intelligence will learn as you use it. The first time you add a receipt from a particular Vendor, it will probably make up random Payees and Account/Categories. Just go ahead and enter the correct information. The next time you send in a receipt for that Vendor, it will fill in the information you entered last time, and you can modify it again as needed.
If you open up the new Expense transaction, you’ll see the info you entered, and the Attachment in the bottom left corner (scroll down).
After you’ve completed this step, head over to your Banking. You’ll see the expense on the list now has a green Match icon! Click Match to accept it.
Using Banking First
Notice that Receipts form doesn’t allow for Splits or Job Costing. To enter a Split, assign the transaction to a Customer, or make it Billable, head over to the Banking Feed first. Once you have entered that information, head back to Receipts. You’ll see a Match here, which adds this receipt to the existing transaction.
Conclusion
If you’re tired of chasing down your employees to submit their receipts, and it’s overkill for you to pay for a more robust receipt management solution like Receipt Bank, Hubdoc, or AutoEntry, QBO’s new Receipt Capture is a welcome addition to solve this pain point.
Was this tip helpful? Take a look at our QBO Knowledge Base, our ever-evolving collection of QuickBooks Online training videos.