
How to Screenshot on Mac
During our Mac training classes, we often get asked about screenshots. How do you take a screenshot on Mac? How can you easily edit them after? What do you do if things aren’t working? Keep scrolling to learn more, or watch our screenshot on Mac video tutorial below!
What is a Mac Screenshot?
Taking a “Screenshot” is also called making a Screen Capture or doing a Screen Grab. A screenshot is basically taking a picture or video of your whole screen, a specific window, or a selected portion of your screen.
Traditionally on your Mac, you had to use a keystroke to take a screenshot.
- Command-Shift-3 = Capture the Entire Screen
- Command-Shift-4 = Capture Selection of Screen
- This keyboard command would change your cursor into a crosshair that you could click and drag across the area you wanted in the capture.
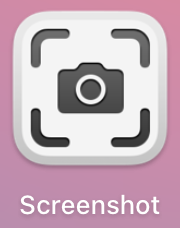
Although these keystrokes still work the same way they always have, Apple has now included a utility in its macOS operating system called Screenshot. To find this utility, look in your Launchpad, in the Other folder. You can also activate it by using the keystroke Command-Shift-5.
How to Take a Screenshot on Mac
Once the Screenshot utility is activated, a little toolbar appears at the bottom of your screen.

Choose between multiple options to take picture of the screen including:
Capture Entire Screen on Mac
- Click the Capture button to take a screenshot
Capture Selected Window on Mac
- Use the Camera icon cursor to click on the Window you want to capture
Capture Selected Portion Only
- Drag the handles on the corners or edges of the dotted line selection area
- Click the Capture button to take a screenshot
You can also use Screenshot to make a video recording of your screen using:
Record Entire Screen on Mac
- Click the Record bottom to begin recording your entire screen
- Look for a small Stop button in the top right of your Menu bar ( the Menu Extras area) to stop the recording
Record Selected Portion Only
- Drag the handles on the corners or edges of the dotted line selection area
- Click the Record bottom to begin recording your selected portion of the screen
- Look for a small Stop button in the top right of your Menu bar (in the Menu Extras area) to stop the recording
How to Edit a Screenshot on Mac
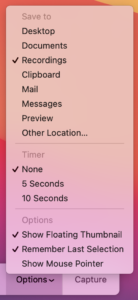
When the Screenshot utility is open on the bottom of your screen, use the Options dropdown to:
- Specify the location where your Screenshots will be Saved
- Set a Timer
- What Microphone to use for videos
- Show Floating Thumbnail
- Remember Last Selection
- Show Mouse Pointer
If you have the Show Floating Thumbnail option selected, you will see a thumbnail of your Screenshot floating in the bottom right corner of your screen for a few seconds.
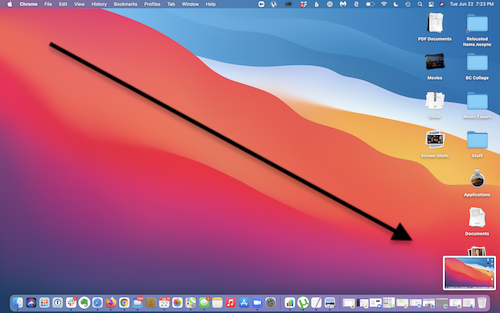
- Swipe right to automatically save your Screenshot
- Drag the thumbnail into a document, email, or even a message
- Click on the thumbnail and it will open into an editing window so you can crop, mark up, share, and even trim a recording.
- Use the keystroke Command-C to copy the entire screenshot into the Clipboard to paste elsewhere later
Screenshot on Mac not Working? Here’s How to Troubleshoot it
You should be able to use the above-mentioned keystrokes to take Screenshots in all Apple operating systems, but the Screenshot utility was not added until macOS 10.14 Mojave. So if you are on a previous version of macOS (OS X), then you will need to upgrade to Mojave or higher.
If you are already running a newer version of macOS, then doing a full shutdown of your computer is your only option if the Screenshot utility is not functioning properly.
Considerations When Taking a Screenshot on Mac
- Make sure to specify your Save To location in the Options dropdown so you know where to find your screenshots
- If you want to capture a specific window, make sure it is ready and visible so that you can click on it with the Camera icon cursor.
- If you want to drag the thumbnail to an email or text message, make sure the message is ready on the screen so you can drop it into the desired message
Need Help with Your Mac?
Join our incredible Apple community and enjoy unlimited and exclusive access to our entire library of Apple training videos, classes, community discussion and more!