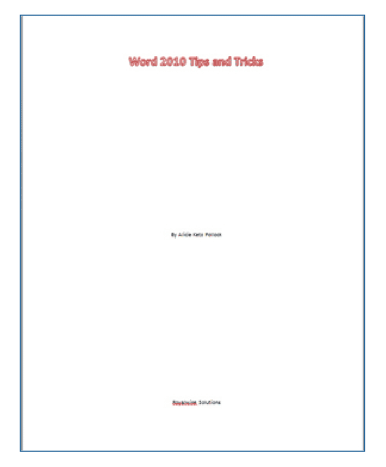
The title on a cover page is traditionally located about 1/3 to halfway down the page. Have you found yourself pressing Enter repeatedly to get there? Don’t! Instead, follow these steps to center the page vertically, from top to bottom.

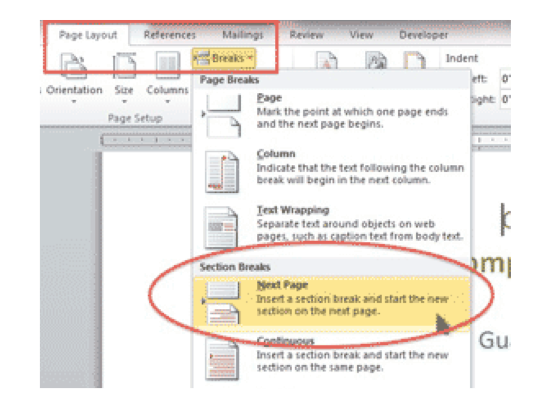
1. Insert a Next Page Section Break
Click the cursor at the beginning of the text to appear on page 2. Go to the Page Layout?Breaks and click on NEXT PAGE in the SECTION BREAKS area.
Click back on the cover page.
2. Center the Page Vertically
Go to the PAGE LAYOUT ribbon and click on the LAUNCHER BUTTON in the bottom right corner of the PAGE SETUP GROUP.
Change VERTICAL ALIGNMENT: to either Center or Justified.
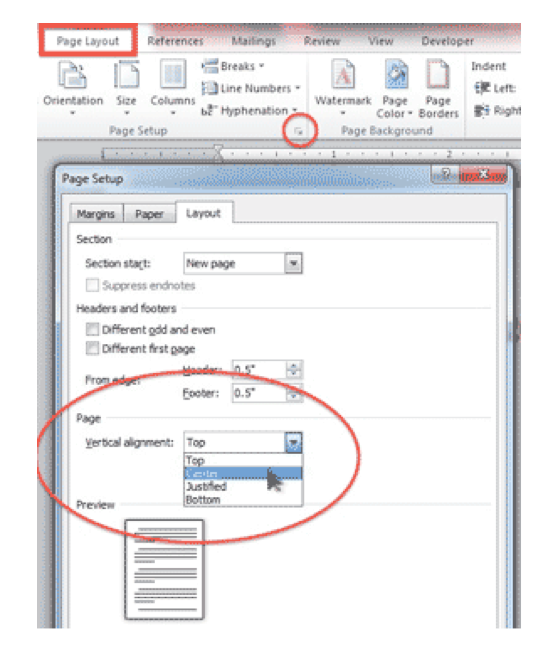
Center drops the text to the middle of the page from top to bottom, as shown in the first image. Justified spreads out the lines so that they are evenly spaced.
Buy the Book
 For the complete collection of time-saving tips and tricks, buy my book, Microsoft Word 2010 Tips & Tricks. Available in eBook, iBook, Multi-touch, and paperback versions.