How to Autofill in Excel
I’m a stickler for efficiency, especially when it comes to data entry. Why waste precious time and effort when there is a quicker, easier way? That’s why I’d like to introduce you to one of my favorite Excel tools I teach in my Microsoft Office training, the Autofill Handle.
Let’s say you’re setting up a monthly budget. After you type your expenses in the column A, you’ll want the months in the row across the top of your spreadsheet, right? To save time, instead of typing each month, use the Autofill handle! It allows you to automatically fill cells with data that follow a specific pattern or that is based on data in other cells.
Here’s how it works:
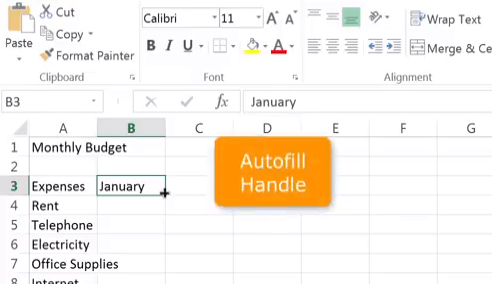
Type January in cell B3. If you look really carefully, you’ll see a tiny dot in the bottom right corner of the cell. Place your cursor on top of the dot and notice that the cursor becomes a black plus sign. This is the Autofill Handle!
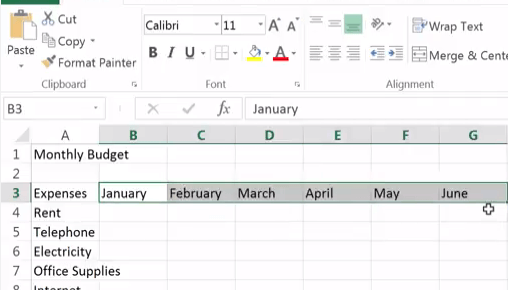
Next, click-drag across 11 columns and Excel automatically inputs the rest of the months for you.
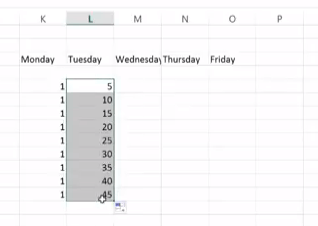
The Autofill works for more than just months. Try it with days of the week, numbers, and formulas. Note that with numbers, if you only type in one number it will repeat that number, but if you establish a pattern by typing at least two or three numbers, then highlighting all of them before you drag the handle, it will repeat the pattern.
Watch our video below for a demonstration of the Autofill Handle.
If you want to learn more, take my Learn Excel in 3 Hours Flat online course on Udemy.com. You’ll not only learn all the practical tools you’ll use on the job everyday, but also how to be more productive!
Act now and get the course for only $59 $49.
Want more MS Office Training?
Click below to see our full library of MS Excel training!


