 The Banking Feed Has New Options!
Look what I found!™ QuickBooks Online’s Banking Feed has new options so you can customize it to suit your own company’s workflow!
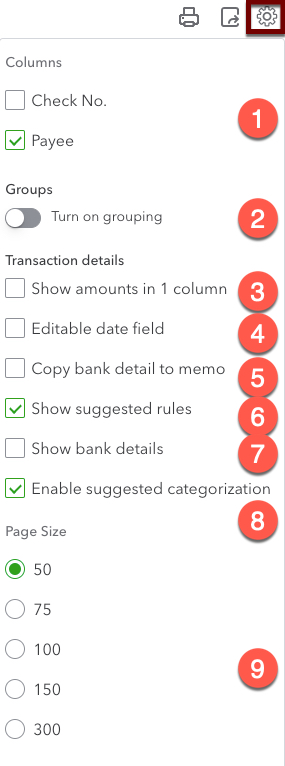
To see the list, click on the baby gear on the top right of the list of transactions in the Banking Center.
1. Add and remove columns
You can turn on the Check Number column if it will help you to sort by check numbers (some banks don’t include the check number in the Bank Detail, in which case this won’t help).
You can also turn off the Payee column, but this is a BAD idea! You need to assign Payees to see these expenses in the Vendor list, or if they’re 1099-related. ALWAYS assign a Payee, even if it’s generic.
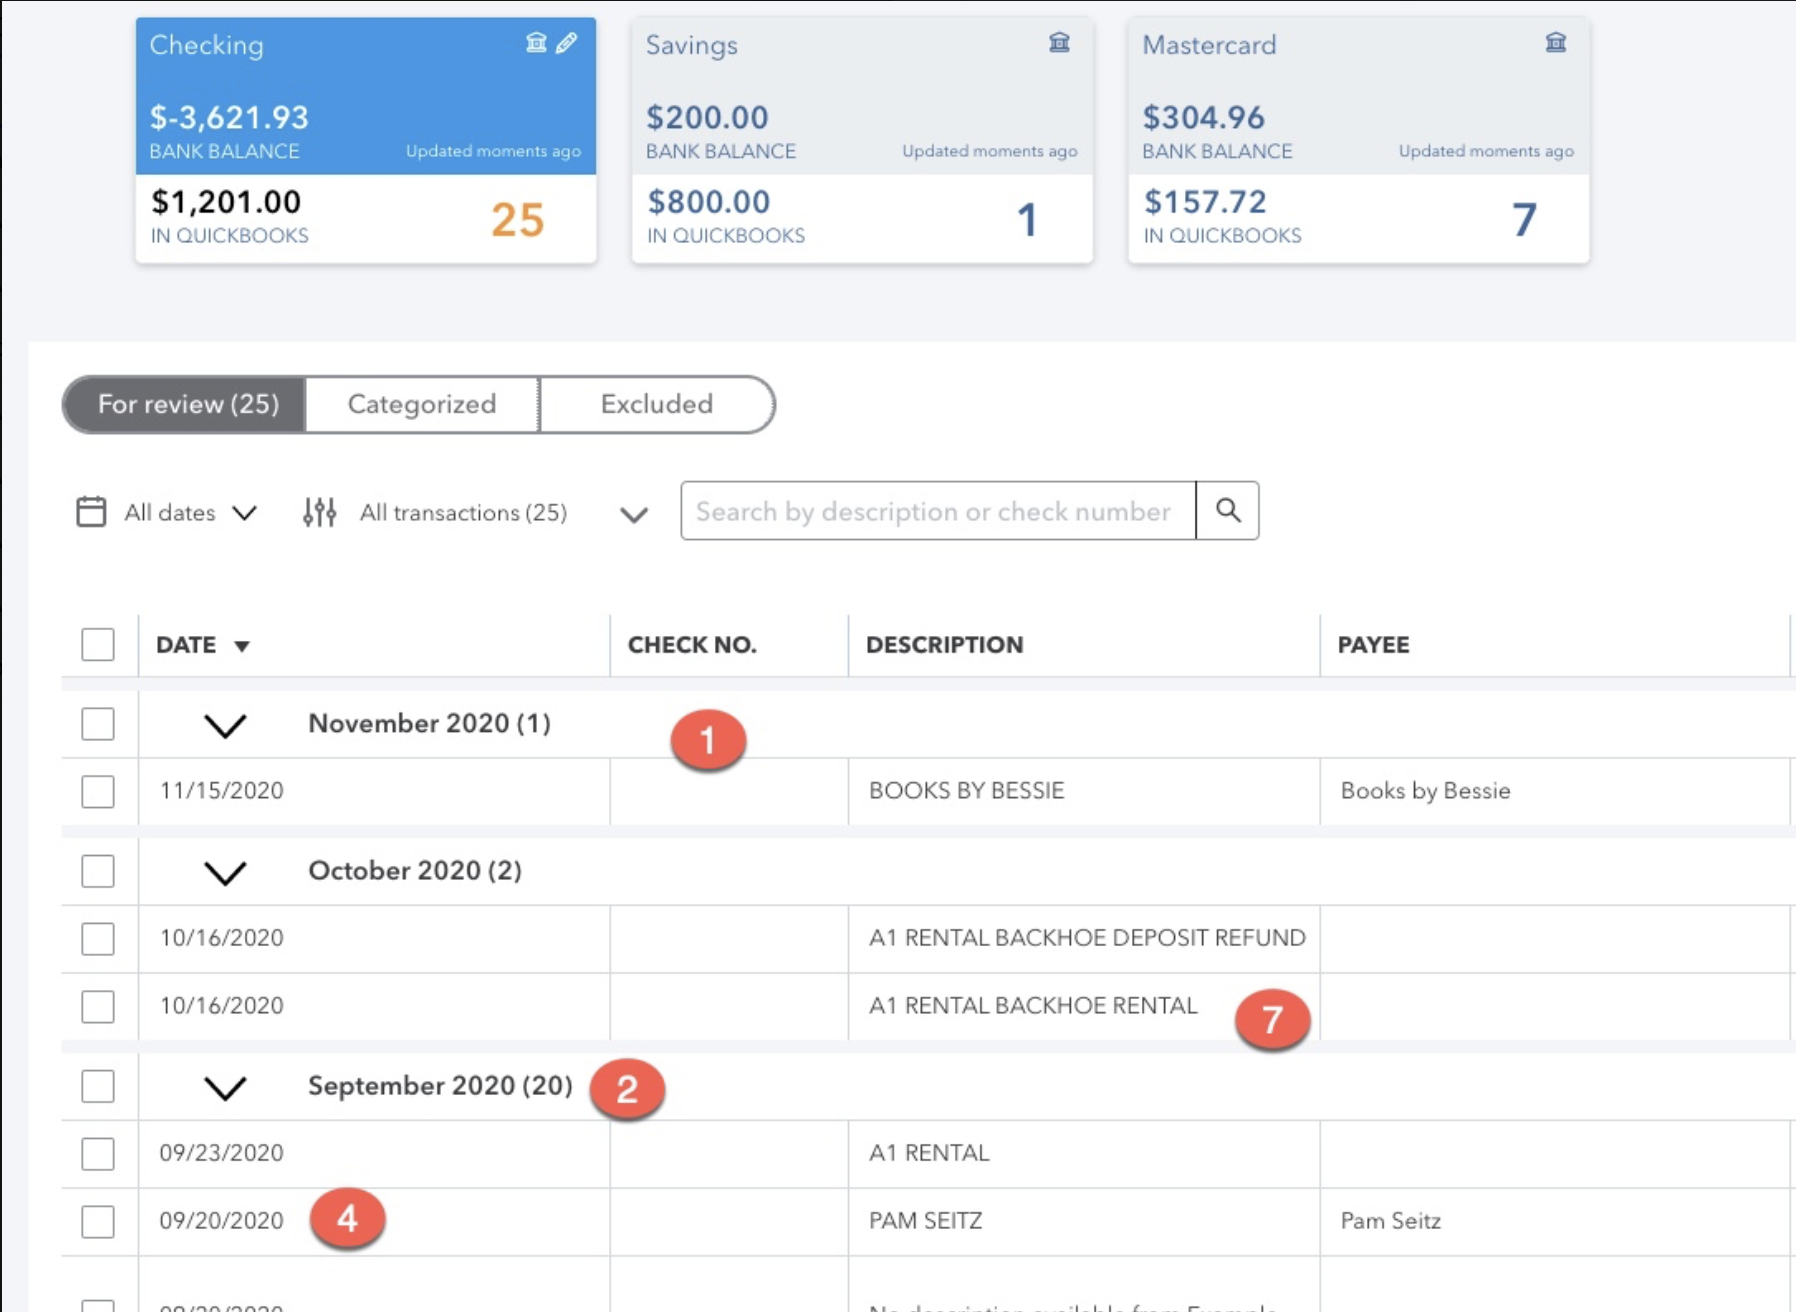
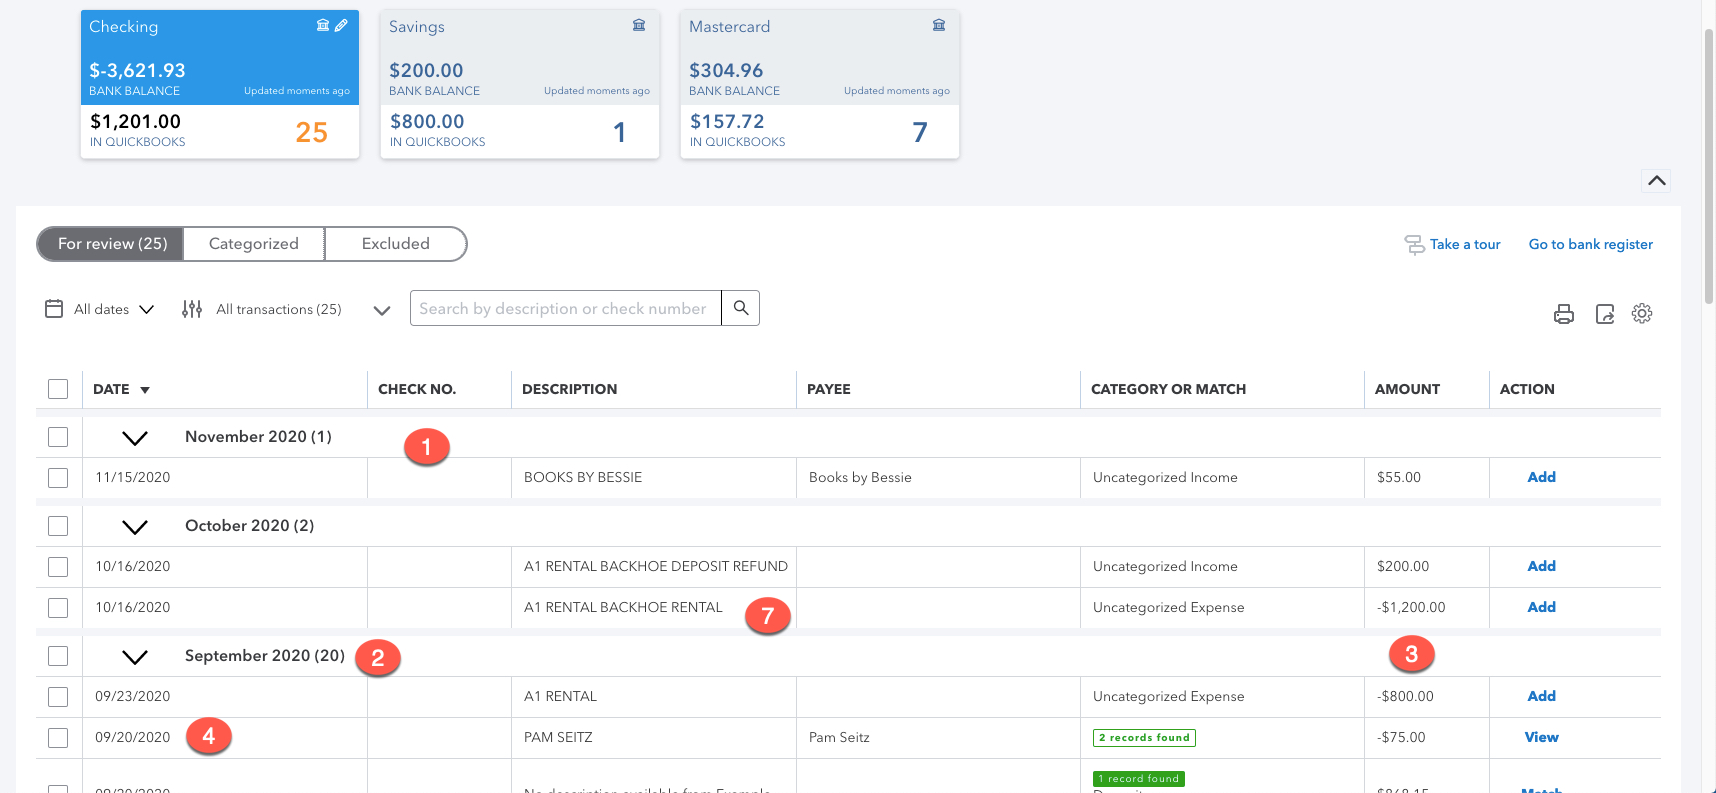
2. Turn on Grouping
The Banking Feed is sorted by Date. This will allow you to expand and collapse the transaction list by month.
Did you also know you can sort by Description? That allows you to manage an entire year’s worth of vendor transactions all at once, instead of 12 times through the year. Sorting by Description in conjunction with Groups will expand and collapse the feed by Bank Detail. Pretty slick!
3. Show amounts in 1 column
By default, the Banking Feed has a Spent Column and a Received column. This option combines them into one. Deposits will have positive numbers and expenses will show as negative numbers.
4. Editable date field
Some companies do their bookkeeping after-the-fact by relying on the Banking Feed to enter their expenses. Most of the time this works fine for small businesses, but in some circumstances this is not 100% accurate.
For example, you may write a check at the end of the month that doesn’t clear until the following month. The check really should be dated when you wrote it, but if you rely on the banking feed, it will be reported in the following month.
Making the date field editable allows you to change the transaction date so it appears in the desired period.
5. Copy bank detail to memo
The Bank Detail is always attached to each deposit and expense; you can see it by clicking on the blue “Online Banking Match” link in the upper left of every transaction.
If you would also like to include that info in the Memo field of the transaction, which makes it visible on reports and searchable, click this box! You can still add your own specific details to the memo before or after the bank’s text.
6. Show suggested rules
After you categorize two transactions with identical Bank Detail, QBO offers to create a Suggested Rule to automate the entry of similar categorizations. Sometimes this is helpful, but other times you still want full control. If you want QBO to just stop offering, clicking this box. You’ll just need to initiate Rules yourself moving forward.
7. Show bank details
The Banking Feed grid’s Description field relies on QBO’s artificial intelligence to interpret the Bank Detail into something a little more understandable. More often than not, this description is nothing more than a best guess, and can be wildly inaccurate. If you’re not paying attention, clicking on the transaction to eyeball the actual Bank Detail, you may be entering bad data.
Clicking this checkbox shows the actual Bank Detail in the grid, instead of Intuit’s helpful suggestions. While you’ll see more financial gibberish, it’s one less click to understand the genuine purpose of the transaction. I always turn this on for greater speed and accuracy.
8. Enable suggested categorization
Have you ever noticed that QBO suggests Payees and Categories that are wildly inaccurate? Sometimes they’re recommending the same coding from a similar past transaction; other times it’s looking to its crowdsourced database to hazard a guess. Sometimes this speeds up data entry, but if you’re not paying attention it creates bad data.
If you would rather manually categorize each transaction to minimize the risk of making a mistake, turn off this checkmark. You won’t see “Recognized” transactions any more.
9. Page size
Got lots of work to do? Show up to 300 rows on a page! This is useful for batch entry projects, but after your initial file setup, you should see more than a few dozen transactions on the screen at any given time. But there’s no harm done in going big here.
Here’s what the Banking Feed looks like once you’ve turned everything on (not all options are visible from this screen):
Conclusion
Overall, I’m delighted that the QuickBooks Banking Feed new options allow you to customize its functionality to suit your needs.
To learn more about how to use the Banking Feed properly, including best practices and troubleshooting, please check out my Banking Center and Reconciliation course at http://royl.ws/QuickBooks-Online-Banking.


0 Comments